PHOTOGRAMMETRIC ENGINEERING & REMOTE SENSING
November 2016
835
Step 3.
Reclassify Ground Points
Next we need to reclassify Ground Points immedi-
ately around the building and within the building
footprint. These two processes use the same LP360
tool but are accomplished in two separate operations.
A.
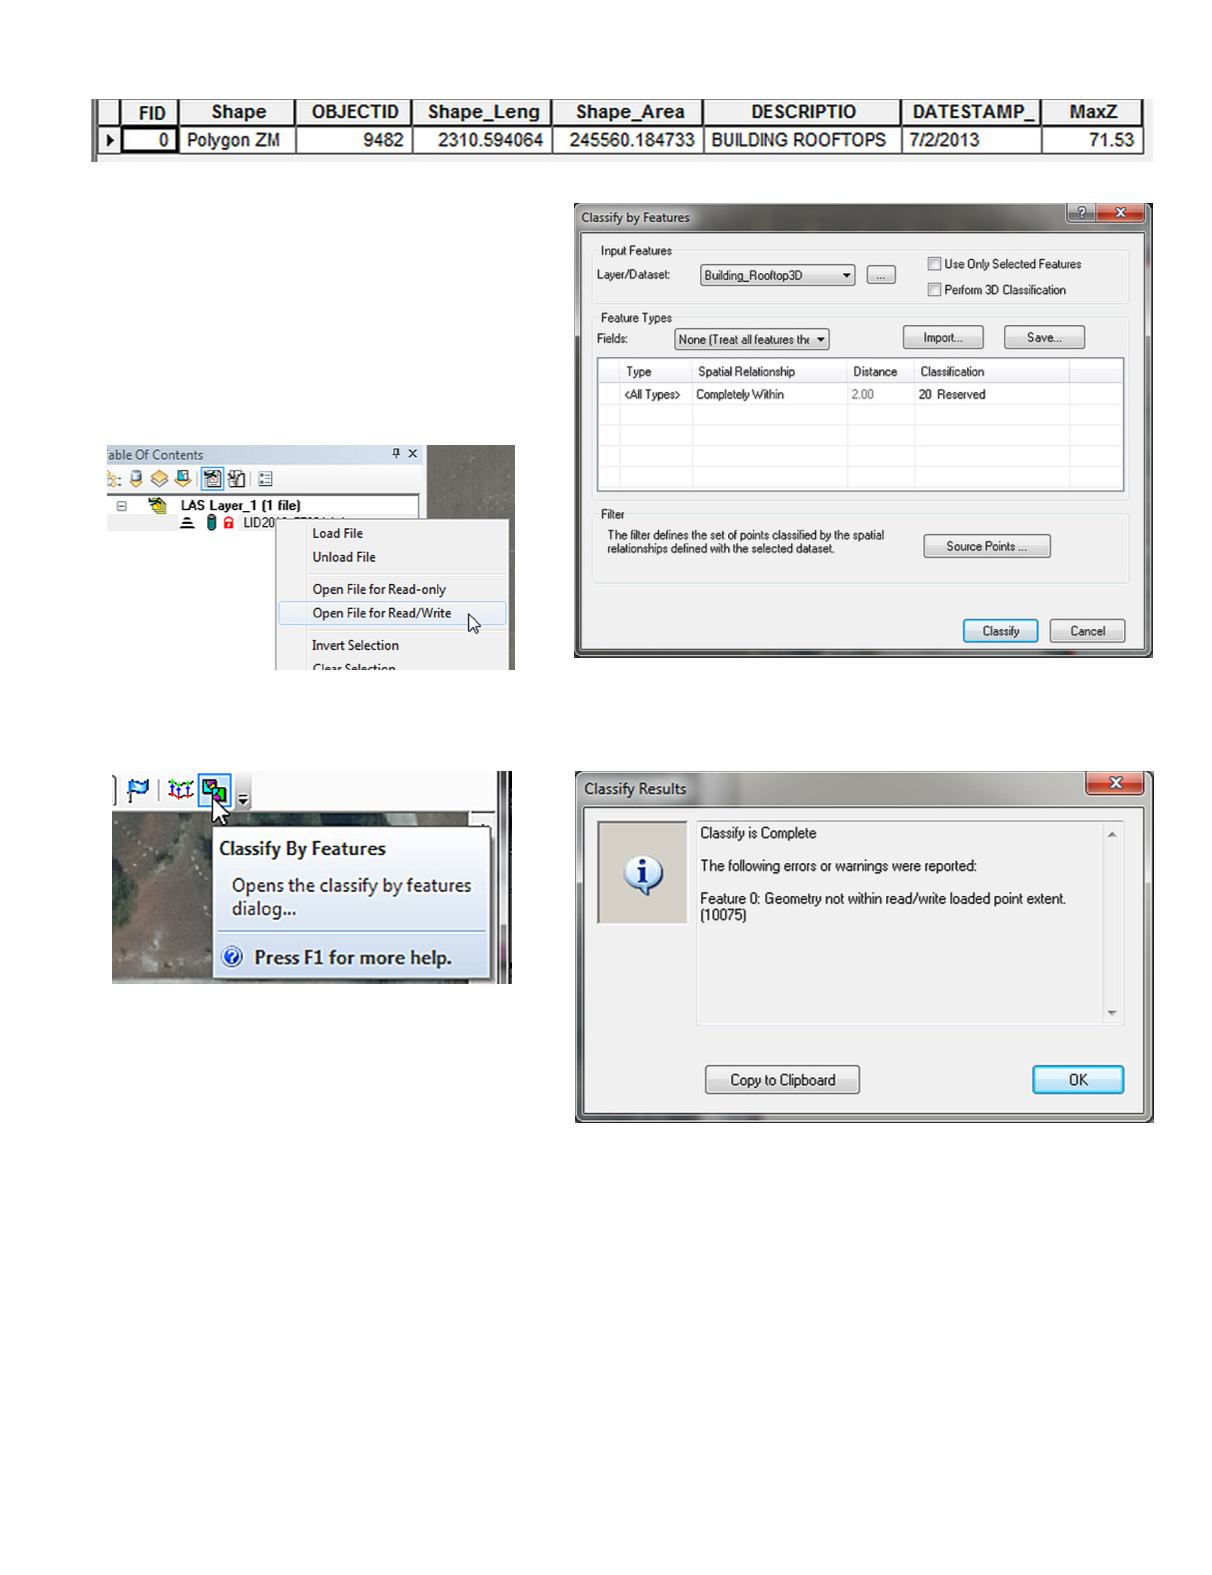
In the Table of Contents, on the LAS Files TAB,
open the LAS file for Read/Write
B.
On the LP360 Classify Toolbar, use the Classify
by Features tool
C.
On the Classify by Features Dialog, for
1. Layer/Dataset, choose the Building_Roof-
top3D.shp file
2. Spatial Relation, choose “Completely Within”
3. Set the Classification to “20 Reserved” (or an-
other unused class, or set the Withheld flag),
4. Set the Source Points… to Class 2 (and any
other ground classes)
5. Press Classify
Then the process is complete, you may get a “Classify Results” mes-
sage box like:
Just check that there are no points ground within the building foot-
print.
D.
Repeat the process, only this time, instead of choosing “Complete-
ly Within” for the Spatial Relationship, choose “Within a Distance
of” and fill in 3.0 for Distance. This will create a 3’ buffer around
the building.


